
What would you change about your homeschool space?
What do you need to create more productivity daily?
Would order increase your efficiency?
When your space is organized, your determined routine flows smoothly. Since homeschooling is hard every day, why not make it easier by creating improved function that fits you and your kids. Devise spaces that generate better results with cheery colors, fun storage and clearly placed school items. Perhaps some of these ideas will help launch your school days into more pleasant, streamlined hours.
1. Determine your work areas.
As you consider your home and the ages of your children, determine where school might best work in your home. If your children are young, the school space might need to be situated near the kitchen and laundry room. Thinking through how your morning functions offers wise ideas on the placement of your school space. Most days school is done in our school room or in the living room. Our family gravitates toward the outdoor patio when the weather is gorgeous in fall and spring. Younger children might enjoy school in the early part of the day at a designated table, while later we might pile up on the couches for reading.
2. Sort everything into piles or boxes first.
Once the curriculum and resources are gathered, decide how best to organize each student’s materials. For some time we have used fold up tables so we can change up the arrangement. Each student benefits from gathering his supplies such as sharpened pencils, markers, colored pencils, scissors, math tools and a variety of table and post-it products. Needs vary based on age and courses pursued. For many years plastic boxes with a color selected by the child and marked with the student’s name stored needed things. Each compiled a pencil bag for travel with their backpack. Taking time to prepare and keep needed resources at hand supports a smooth day focused on learning not searching for the right item.
Once all books and resources are sorted out for each student, choose a storage box or basket to keep things handy and organized. Some enjoy bright rooms with colorful storage, while others prefer neutral tones with black and brown. Whatever is selected, just electing a plan creates a sense of direction and order.
A tip for large families involves selecting a color that belongs specially to each child. This eliminates stretching the mother’s memory when identifying a myriad of items. For example child one’s pencil box, storage box and notebooks would all be yellow. Child two’s items might be blue. Child three might be given green. This system often extends itself to the cups in the kitchen and other areas. Some view this a way to simplify while others might be overwhelmed. As with all ideas, settle on ones that simplifyand just pass by others that complicate.
3. Find bookshelves, baskets or storage containers
One year for my birthday I asked for eight bookshelves. My husband found this curious. However, bookshelves were just the solution to promote order to my school supplies and always growing personal collection. Many companies offer bookshelves, but my favorite are hands down the IKEA bookshelves. In addition to being sturdy and versatile, they are priced surprisingly less than many inferior choices. He drove me to the nearest IKEA and bought eight bookshelves. One of my clever boys put them together. The school room was rearranged and resorted. Happy mom!
If you are schooling from your kitchen table, locate storage baskets or bins that meet your needs. Every day when you finish with school, take a few minutes to put everything back in its place. Some use a cabinet with closed doors. Others place matching baskets back onto a nearby shelf. Whatever works for you and your space, do it. Granted, sometimes it takes several adjustment to figure out what really works. Just keep tweaking your situation until it flows.
4. Group by ages, chronological history, subjects, core, supplementary materials.
When contemplating all of the materials for your school needs, you may want to just keep this year’s items out. Some like to box up and store away anything that might not apply to this year. During the school year, I often think of something that I need from my stash. It’s great to be able to access it quickly. Just today I thought of all my books on Pearl Harbor. Because of an upcoming situation, I wanted them to read through these. They were handy.
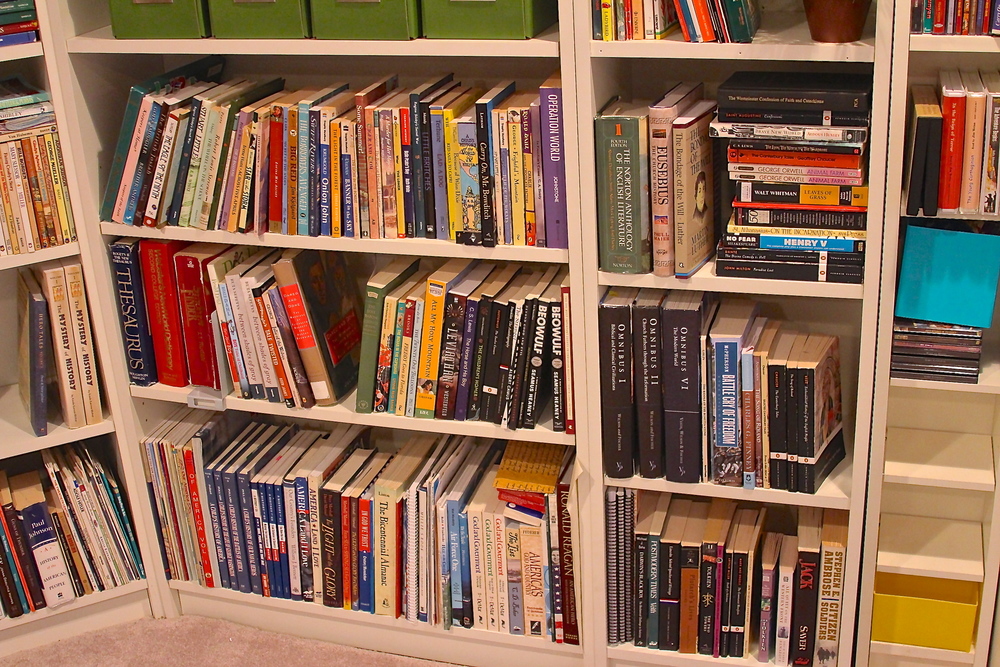
As schooling includes a multitude of items, the organization of the books and resources continues to change. Over the years, many ideas have been tried here, but we settled on the organization below:
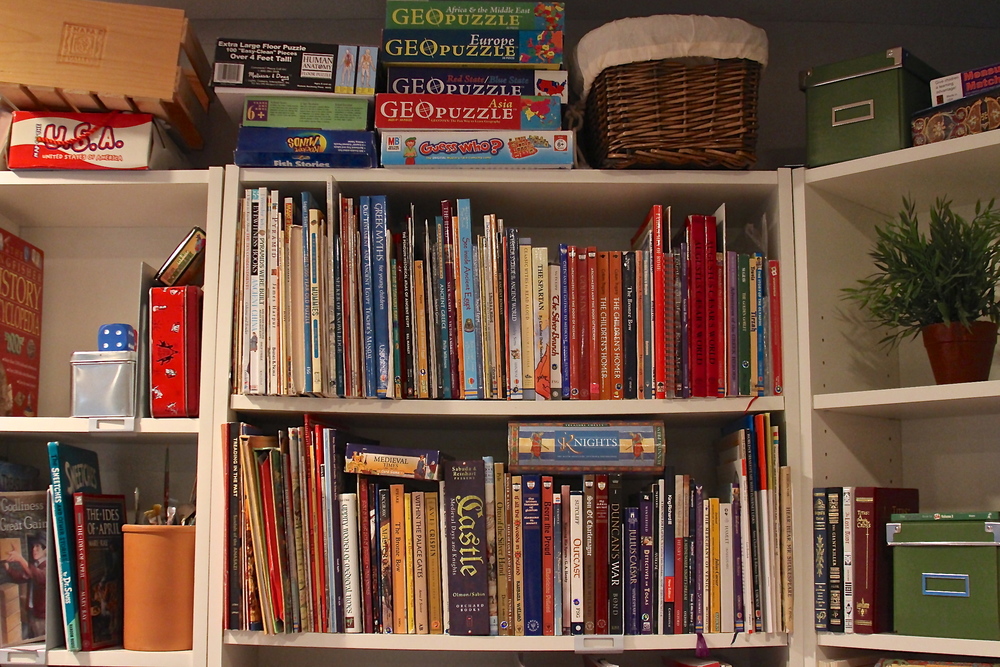
- History – chronologically from Creation, Ancient, Greece, Rome, Medieval, Renaissance, American, World
- Science – encyclopedias, singular subject books, kits
- Literature – classic, must reads, series of classics, poetry, Shakespeare,
- Young books – for our pleasure, for speeches we write, for young visitors, & babysitting opportunities.
- Art – history, how-to books, various medians, various collections from famous artists
- Missionary – favorite biographies
- Biographies (These are mixed into other categories as well.)
- Resource books – dictionaries, Synonym Finder, Encyclopedias
- Audio books – a sizable collection for a struggling reader and for the enjoyment of us all.
Other areas include
- Extra paper
- Writing tools – pencils, Expo markers, rulers, crayons, colored pencils,
- calculators, erasers,
- 3×5 cards, 4×6 cards, 2×3 cards
- puzzles
- games
- memory cards from previously retained material
All school rooms need a copier and an electric pencil sharpener.
This is the truth!
5. Sell, give away or donate extras
Once a year I go through ALL items in our school space. As my youngest is now doing all highs school material, so many levels have been left behind. Cleaning out is very emotional, but it must be done. This year eight boxes left this space for the used book sale, to share with friends or to donate. Purging is hard work, but immensely rewarding.
6. Identify your materials with tags or signage.
Once you feel confident about your placement of your school books and supplies, be sure to label as much as possible. Although I know where things go because I organized the area, my marking will increase the likelihood that it will stay orderly. A label maker or Post It products greatly aid this goal. The bookshelves need labeling. Use a Sharpie to identify boxes and bags. Cute chalkboard tags are available nearly everywhere. When using baskets, use these tags to help you pinpoint its contents with a glance.
7. Paint walls bright colors
Our school room is painted a bright green and vibrant blue to coordinate with the world map that graces a whole wall.
8. Rotate your wall maps and posters
Coordinate with your studies for the year. I collect maps for each subject. The maps rotate based on our focus in a variety of subjects. Geography is a mainstay, but the science, English and history posters rotate. Changing them out really creates new interest. After a while students stop reading the walls around them.
9. Learning Centers
As you finish organizing all of the bigger categories in your homeschool space, think through areas that can be created which allow you to highlight one subject. This concept is super easy for younger students. Create a math manipulative station, a reading center, or a map area. Your imagination is the limit. Pinterest is full of excellent ideas. Generate some excitement for your homeschool space.
10. Prepare all needed supplies
Supply caddies, boxes, extra sharpened pencils. Dixon Ticonderoga Wood-Cased #2 Pencils remain the best pencil. This sounds silly to mention, but if you cannot appreciate the value of having a healthy stash of these excellent tools, stock up before you start each year. Locate a hole punch, stapler, and all other tools needed to make your job easy.
Purchase a wireless printer. This is a must for all homeschool moms. Once you have one in place you wonder how you lived without it.
Think of what bothers you the most and tackle that first. Once you figure out where you want to do school at your house and sorted out your supplies, locate bookcases and storage containers. By grouping your books and supplies, your space works efficiently. Painting your walls bright colors offers cheeriness and energy. Maps, learning centers and supply boxes increase the productivity of any space.
Personally, I love finding organizing ideas for my homeschool space.
Share your ideas in the comments.
Tomorrow is a new day.
Try something new in your space.
Join Tim and me for a conversation on this topic at Embrace Your Everyday podcast.
More on Homeschooling on these blogs:


[…] 10 Ideas for Organizing Your Homeschool Space […]